SCAD x PowerHouse VFX Week 7
- Poonya Tunkakutiya

- Oct 18, 2022
- 3 min read
Updated: Nov 8, 2022
This week, while my teammates continues to work on tracking, I am planning to fully finish our last model, the Face Integration.
After Nick was able to generate the actor's face with more accuracy, I tried to place the model that I have from last week on to it. However, I found out that there were too many differences in the face. That made me decided to create a new model, rather than trying to adjust the existed one.
Since I use Quad Draw on top of Live Surface for the first model, the process went very fast, which is why I am planning to do the same thing over again on this new model.


This is a quick first pass of the model. After I finish using quad draw to create the plane, I extruded it to create more depth to it. This is to see if it looks right with the face.
Initially, I scaled up the head model since it was easier to work with. Later on, I learned from Nick that I should only work on the original size of the head model since that is the size Nuke read the information out of. Picture below shows how big I scaled up the model and how small it should actually be.

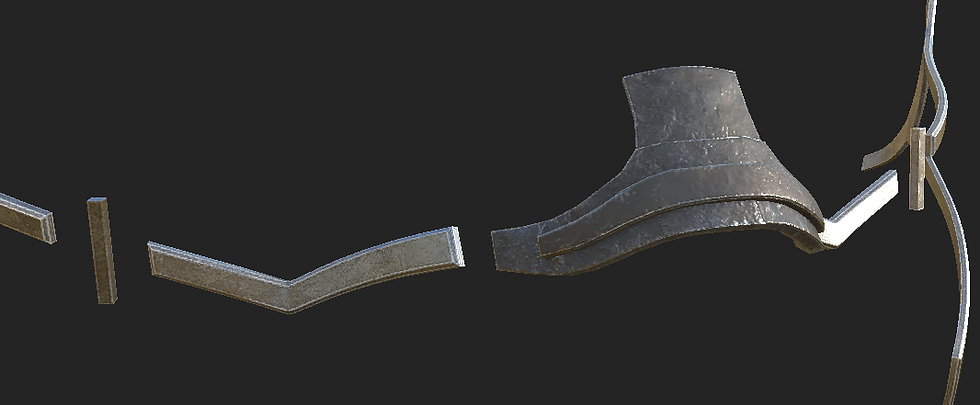
After I scaled the face model down, I started to add some more loops and then smooth them to get the final base shape that I want. The I extruded them all to create some small depth from the face surface. I added some micro detail to the model such as bevels on the edges and extrusion on the nose bridge piece to give the model the design from our previz concept art.

Final model before texturing

Wireframe
Throughout this week, it seems that Nick was struggling with importing the head animation generated from Keen Tool. After trying to solve that problem with other teams, he was able to export those animation into Maya. He quickly showed me the process, however, it is required for both Nuke and Maya file to be in the same computer for the animation to be transferred.
I have no knowledge of Nuke, which is why I was very glad that he was able to help me go through that.
For my model to sit perfectly on the face animation, I will still need Nick's help along with the animation transferring process. We have not got a chance to do sit and work on it together yet, so in the meantime, I started to UV the model.

UV Maps
At first I did not want to start texturing yet since the model will probably required some more adjustment. However, I remember that I can make the texture before hand in Substance Painter and create it as a Smart Material since I only use smart mask to create the micro detail on the model. So once the model is finalized, I can just drop the Smart Material that I create, which will definitely save me a lot of time.
All pieces of the model are metal, so I wanted to show that it has been heavily used, but still looks pretty clean as our character is a female. I want to show that she has the feminine character trait, yet she is tough and has been though some fights.

Overall look of the model in Substance Painter

Close up of a Nose Bridge Piece
Here is a quick render of the model and texture in Arnold Renderer
Additional to this, Deja and I were working back and forth on the Arm model and its textures. There were some problem with transferring the file, including the FBX and texture maps. We try to reference them through a shared space. I am not too experienced with this approach and still lack some knowledge of Maya that is not modeling, so I struggled to transfer them properly. This might have caused some delay to the process, however, in the end, I managed to give Deja all the files she needed!
This is a our clean cut for week 7 check point.
Deja Smith - Compositor
Nick Neff - Compositor
Joleen Zhang - Compositor
Eugene Tunkakutiya (me) - Modeler


Comments