SCAD x PowerHouse VFX Week 6
- Poonya Tunkakutiya

- Oct 15, 2022
- 3 min read
Updated: Nov 8, 2022
3D Models
For this week, I still continue to work on our 3D assets, but with some major adjustments.

Texture First Pass in Substance Painter
After looking at our shot, I knew I needed to adjust my 3D models so that it is easier for everyone to work on.
This model is going to be used in only one of our shot. However, it is going to be our most important shot, so it is better to take more time and consideration into it.
Deja is going to be responsible for this particular shot, so I asked her to tell me a specific timeline in order for me to know where exactly the actor is going to touch our tracking point. Then I created a quick guideline for myself using Photoshop. I overlaid all the screenshots of when the the welding pen is touching the actor's arm and quickly blocked out where the model should be, specifically the circuit boards since there will be interactions.

After I got the idea of where things should be, I started adjusting my models. The new version of the model is basically parts of the old model reassembled into a new piece, which did not took me a long time to finish. This is the first pass of the model on top of the scanned arm.

Joleen brought up a very good point that the model should curved along the arm, which I totally agree. I decided to push the internal part of the model lower so I don't have to bend them, but instead just to adjust the box and the lid (light green color).


It did not fit perfectly as arm is very organic, but after consulting my team who are way more experienced with compositing than I am, they gave me a green light on the model.
This is a quick render of the model in Maya without the texture.

After the model first pass is done, Deja put my model into her Maya file while she was working on the lighting. We worked together back and forth to adjust and maximize the accuracy of the model when put on top of actor's arm. This is a screenshot from
Deja to see if the model sit properly on the arm. It seems to us that it need to be shorter due to where the welding pen touch the skin.

Few adjustments later, we were able to successfully aligning the model to the footage. Now it is time for me to adjust the textures.
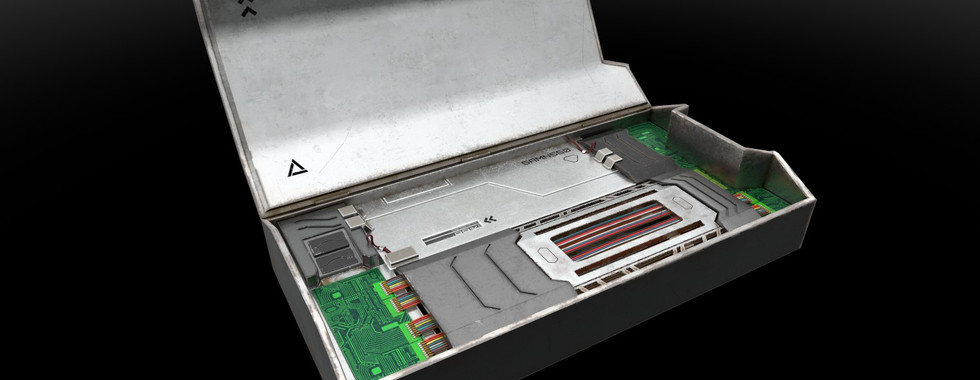
We only make small adjustments, therefore I did not have to make new textures for all the parts. I created a new Substance Painter file for the textures while using the existing texture maps, which helps a lot with the time spent. These are some quick renders that I made in Substance Painter.


Model Turntable
During the week, Nick was able to create a head model of the actor using Keen tool. We figured that it is not accurate enough due to not enough information for the software. We got a suggestion from Sam, our Keen expert in the class, that we will need to take profile pictures of the actors again from different angles to help the software to understand the shape better.
While waiting for Nick to do that, I roughly started to create a model that will go into the actor's face based on our original concept from the beginning of the quarter. This is the first time I learned how to use Quad Draw on Live Surface. It helped with the process a lot as I could quickly create planes along the surface of the model. I then extruded those plane to create more depth. I still leave some parts away as I am still waiting for the updated model that Nick is currently creating.
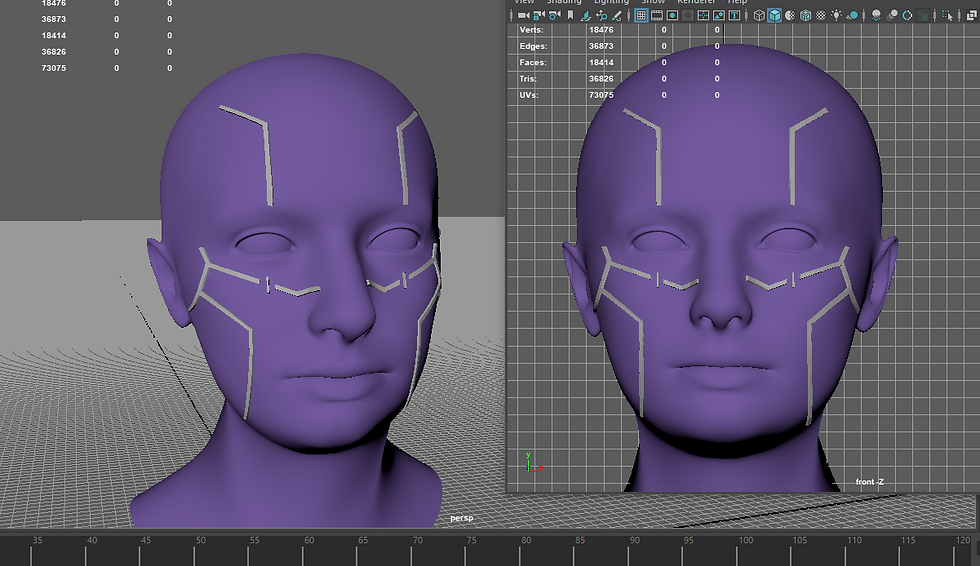
Screenshot from Maya | Face Model WIP

Concept Art from Week 2
This is a our clean cut for week 6 check point.
Deja Smith - Compositor
Nick Neff - Compositor
Joleen Zhang - Compositor
Eugene Tunkakutiya (me) - Modeler

Comments